Create Your Sessions Coder Style Using Marp
Let’s face it, we all love to code. We love to create things and we love to share our knowledge with others. We also love to learn new things and we love to help others.
Especially when you want to share your knowledge with presentations, you want to easily create your slides and you want to be able to share them with others.
I’m one of those presenters that do lots of sessions with co-presenters. I also do a lot of sessions with my co-presenter Kevin Chant. We have been doing sessions together for a long time now and we have learned a lot of things.
There is just one problem though. When we work on the same sessions together, we have to use the same tooling. That means that we have to use the same tooling for creating our slides and we have to use the same tooling for sharing our slides. We use PowerPoint for creating our slides and we use PowerPoint for sharing our slides. That’s not a problem when you are working on your own, but when you are working with others, it can be a problem. That’s because when I change a slide, let’s say slide 10, and I save it in our Github repository, and Kevin changes the text on slide 10, and he saves it in our Github repository, we will not know what the other person has changed unless we open the unchanged slide in PowerPoint and compare it with the changed slide in PowerPoint. GitHub is not very good at showing changes in binary files which is what PowerPoint files are.
That’s not a good way to work together. We want to be able to work together in a better way. We want to be able to work together in a way that we can easily see what the other person has changed.
That is what this blog post is about. I will show you how you can create your slides in Markdown and how you can use Marp to export your slides to PowerPoint, PDF, and HTML.
Markdown
Markdown is a lightweight markup language with plain text formatting syntax. It is designed so that it can be converted to HTML and many other formats using a tool by the same name. Markdown is often used to format readme files, for writing messages in online discussion forums, and create rich text using a plain text editor.
The fact that Markdown is plain text makes it very easy to work with. You can also easily follow along with any changes in Git because it’s just plain text.
Marp
Marp is a Markdown presentation ecosystem. It provides a powerful Markdown presentation writer and a set of web-based slide deck viewers. Marp is built on the Electron framework and it is available for Windows, macOS, and Linux.
Marp is a great tool to use when you want to create your slides in Markdown. It’s very easy to use and it’s very powerful. It’s also very easy to share your slides with others.
There are a lot of different ways to create your slides in Markdown. You can use Visual Studio Code, you can use Visual Studio Code with the Marp extension to export your slides to PowerPoint, PDF, and HTML.
That’s exactly what I’m going to show you in this blog post. I will show you how you can create your slides in Visual Studio Code and how you can use the Marp extension to export your slides to PowerPoint, PDF, and HTML.
Installing the Marp extension
To install the Marp extension, you need to open Visual Studio Code and then open the Extensions tab. You can do that by clicking on the Extensions icon in the left menu.

In the Extensions tab, you can search for the Marp extension. You can do that by typing Marp in the search box.
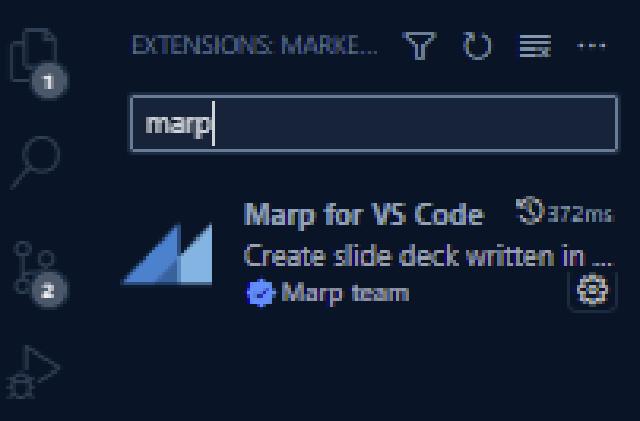
When you have found the Marp extension, you can click on the Install button to install the Marp extension.
That’s it. You have installed the Marp extension. Now you can start creating your slides in Markdown.
Setting up your presentation
I like to organize my presentations using folders. You don’t have to but it makes the whole process a lot easier.
My presentations folder would look something like this:
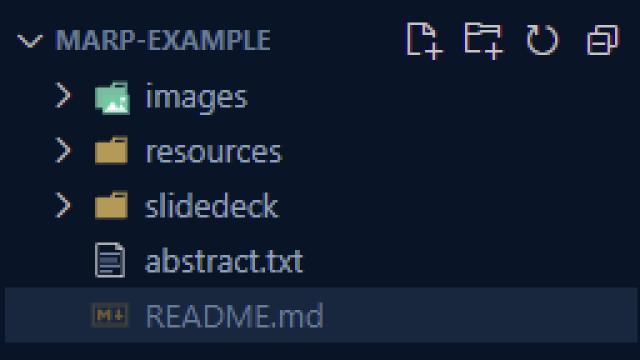
- images: contains all the images that I use in the slides
- resources: contains resources outside the slides like VMs, scripts, etc.
- slidedeck: contains the slides in Markdown and the exported slides in PowerPoint, PDF, and HTML format.
It also contains two files:
- abstract.md: contains the abstract of the session
- README.md: contains the README of the session for other info which is easily visible on GitHub
Of course, you can also use a different folder structure. It’s up to you.
Create the slide deck file
To create a new slide deck file, go to Command Palette (Ctrl+Shift+P) and type Marp: New Slide Deck. You can also click on the Marp icon in the left menu and then click on the New Slide Deck button.
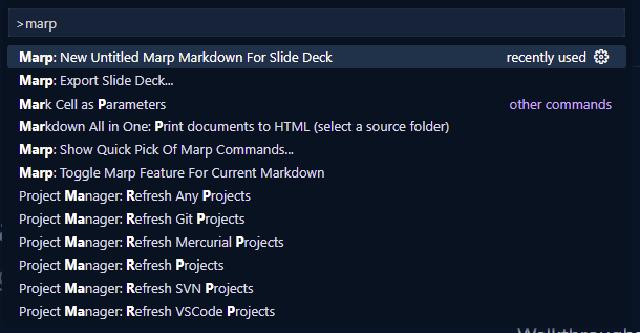
This will create a new document that looks like this:
---
marp: true
---
This is the front matter of the slide deck. It tells Marp that this is a slide deck and it tells Marp that it should use the default theme.
It also toggles by opening the quick picker from the toolbar icon and selecting “Toggle Marp feature for current Markdown”. (markdown.marp.toggleMarpFeature).
Save the file as slidedeck.md in the slidedeck folder.
It also enables you to directly see the preview of your slides in Visual Studio Code. You can do that by clicking on the Preview button in the left menu.

This will open another tab in Visual Studio Code with the preview of your slides.

Create the first slide
To create the first slide, you can just type the first slide. You can also use Markdown to format your slide. For example, you can use the # character to create a title.
# This is my first slide

Text for the first slide
To create the next slide(s) you can just type --- on a new line. This will create a new slide.
---
marp: true
---

# This is my first slide

Text for the first slide

---

# This is slide two
Configuring the slide deck
There are several settings that we can make to adjust the slide deck.
Examples of settings are:
- theme
- pagination
- leading page
- background image
- background color
Theme
Standard, there are two themes available: default and gaia. You can also create your own theme.
To change the theme, you can add the theme setting to the front matter of the slide deck.
---
marp: true
theme: gaia
---
Pagination
You can add pagination to your slide deck. To do that, you can add the pagination setting to the front matter of the slide deck.
---
marp: true
theme: gaia
paginate: true
---
Leading page
You can set that the default layout of the page as the leading class. To do that, you can add the leading page setting to the front matter of the slide deck.
---
marp: true
theme: gaia
paginate: true
class: lead
---
You can also combine multiple classes:
---
marp: true
theme: gaia
paginate: true
class:
    - lead
    - invert
---
Speaker notes
Let’s be honest we all use the speaker notes in our slides, right? Well, I do. I use the speaker notes to write down the things that I want to say during my presentation.
To add speaker notes to your slides, you can use the following syntax:
---
marp: true
theme: gaia
paginate: true
class:
    - lead
    - invert
---

# This is my first slide

---

# This is slide two

<!-- these are speakers' notes and they will not be visible in the slides themselves -->
The end result will look like this:
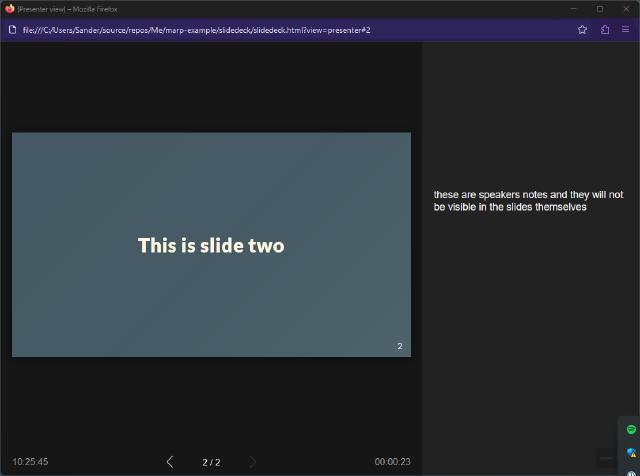
The notes are only exported in the HTML and PowerPoint export. They are not exported in the PDF export or the image exports.
Exporting the slide deck
You can export your slide deck to PowerPoint, PDF, and HTML. You can also export the first slide as a PNG or JPEG image.
To export the content of the active Markdown editor, open the quick pick from Marp icon on the toolbar and select “Export slide deck…”. (markdown.marp.export)
You can also execute a command from the Command Palette (F1 or Ctrl/Cmd+Shift+P). Type “Marp: Export slide deck…” and select the export target.
The following file types are supported:
- HTML
- PPTX (PowerPoint document)
- PNG (First slide only)
- JPEG (First slide only)
Personally, I like to export my slides to PDF and HTML. I use PDF for my slides and I use HTML for my speaker notes.
Recap
You can do a lot of things in the front matter of the slide deck. There are a lot of settings that you can use. You can find all the settings in the Marp documentation .
The next time you change your slides or want to collaborate with your co-presenter, you can just use the Markdown file. You don’t have to export the slides to PowerPoint or PDF and then send them to your co-presenter. Change the markdown file, commit your changes to Git, and push them to your Git repository. Your co-presenter can then pull the changes and start working on the slides.
This was just an introduction to what you can do with the Marp extension. I hope you enjoyed this article and that you will start using the Marp extension.

