Consider the following scenario, you’re a database developer and your company has just decided that they want to implement DevOps for databases. You have multiple databases that need to be put under source control and each database needs its database project. The first thing you’ll need to do is decide whether or not you want to use migration-based or state-based deployments. This post is not going to discuss the pros and cons of these different methods, instead, we’re going to use state-based migrations using SQL Server Data Tools (SSDT) solutions.
If you want to know more about state vs migration based deployments, follow this link: https://lmgtfy.com/?q=database+state+vs+migration
Having to create multiple solutions for multiple databases can become a tedious task fast. Besides it’s being repetitive, there is a chance to make mistakes. That is where templates come in.
Templates?!
Yes, templates. But how are we’re going to create a template for an SSDT solution in such a way that it can be reused?
That’s where the PowerShell module called “PSModuleDevelopment” comes in. PSModuleDevelopment is part of the PSFramework PowerShell module.
The PSModuleDevelopment module enables you to create templates for files but also entire directories. Using placeholders you can replace values in the template making it possible to have the name and other variables set. This is where the SSDT template comes in.
I have created a template for SSDT that contains two projects. One project is meant for the data model and the other project is meant for the unit tests.
I did not tell you about that yet, the template enables you to use tSQLt to create your unit tests. In the next blog post, I will demonstrate how to generate basic unit tests using the PStSQLTTestGenerator PowerShell module.
The template can be downloaded from this GitHub repository .
Generate the SSDT solution
But to make things easier for you, I created a script that downloads that template from Github, installs it for you, and creates the SSDT solution in one go. Replace the value for the “projectName” variable with the name of your database and run the script.
# URL for SSDT project template

https://github.com/sanderstad/SSDT-With-tSQLt-Template

# Import the global variables
$projectName = "YOURDATABASENAME"
$templateName = "SSDT-With-tSQLt"
$templateDescription = "SSDT project template including tSQLt"
$projectDestinationPath = "c:\\temp\\SSDT\\"


########################################################################################
# DON'T CHANGE ANYTHING BELOW                                                          #
########################################################################################
if ((Get-Module -ListAvailable).Name -notcontains 'PSFrameWork') {
    Write-Warning "Please install PSFramework using 'Install-Module PSFramework'"
    return
}

# Setup variables
$url = "https://github.com/sanderstad/SSDT-With-tSQLt-Template/archive/master.zip"
$zipFilePath = "$($Env:TEMP)\\SSDT-With-tSQLt-Template.zip"
$archiveDestPath = "$($Env:TEMP)\\SSDT-With-tSQLt-Template"
$pathToTemplate = "$($archiveDestPath)\\SSDT-With-tSQLt-Template-master"

# Check if the template is not already there
$templates = Get-PSMDTemplate # Should not contain 'SSDT-With-tSQLt-Template'
if ($templates.Name -contains $templateName) {
    try {
        Write-PSFMessage -Level Host -Message "Removing PSF template"
        Remove-PSMDTemplate -TemplateName $templateName -Confirm:$false
    }
    catch {
        Stop-PSFFunction -Message "Could not remove template"
        return
    }
}

# Check if the directory is already there
$projectPath = Join-Path -Path $projectDestinationPath -ChildPath $projectName
if ((Test-Path -Path $projectPath)) {
    try {
        Write-PSFMessage -Level Host -Message "Removing project destination path '$projectPath'"
        $null = Remove-Item -Path $projectPath -Recurse -Force
    }
    catch {

    }
}

# Remove the template directory
if (Test-Path -Path $archiveDestPath) {
    try {
        Write-PSFMessage -Level Host -Message "Removing existing archive destination path 'v'"
        $null = Remove-Item -Path $archiveDestPath -Recurse -Force
    }
    catch {
        Stop-PSFFunction -Message "Could not remove archive destination directory '$archiveDestPath'"
    }
}

# Create the project dir
try {
    Write-PSFMessage -Level Host -Message "Creating project directory '$projectPath'"
    $null = New-Item -Path $projectPath -ItemType Directory
}
catch {
    Stop-PSFFunction -Message "Could not create project destination directory"
    return
}

# Download the file
try {
    Write-PSFMessage -Level Host -Message "Downloading file to '$zipFilePath'"
    $null = Invoke-WebRequest -Uri $url -OutFile $zipFilePath
}
catch {
    Stop-PSFFunction -Message "Something went wrong downloading the template archive" -Target $url -ErrorRecord $\_
    return
}

# Extract the archive
try {
    Write-PSFMessage -Level Host -Message "Extracting '$zipFilePath' to '$archiveDestPath'"
    Expand-Archive -Path $zipFilePath -DestinationPath $archiveDestPath -Force
}
catch {
    Stop-PSFFunction -Message "Something went wrong extracting the template" -Target $url -ErrorRecord $\_
    return
}

# Create the template
try {
    Write-PSFMessage -Level Host -Message "Creating new PSF template '$templateName' from '$pathToTemplate'"
    New-PSMDTemplate -ReferencePath $pathToTemplate -TemplateName $templateName -Description $templateDescription -Force
}
catch {
    Stop-PSFFunction -Message "Something went wrong creating the template" -Target $url -ErrorRecord $\_
    return
}

# Create the project
try {
    Write-PSFMessage -Level Host -Message "Creating solution from template '$templateName'"
    Invoke-PSMDTemplate -TemplateName $templateName -OutPath $projectDestinationPath -Name $projectName -Force
}
catch {
    Stop-PSFFunction -Message "Something went wrong creating the project" -Target $url -ErrorRecord $\_
    return
}
Open windows explorer with this solution
explorer (Join-Path -Path $projectDestinationPath -ChildPath $projectName)
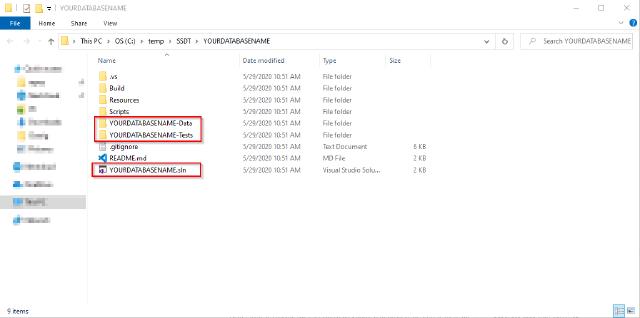
After running the script you should see something like this

The result
After the script ran successfully, it will open an explorer window showing the just generated SSDT solution.

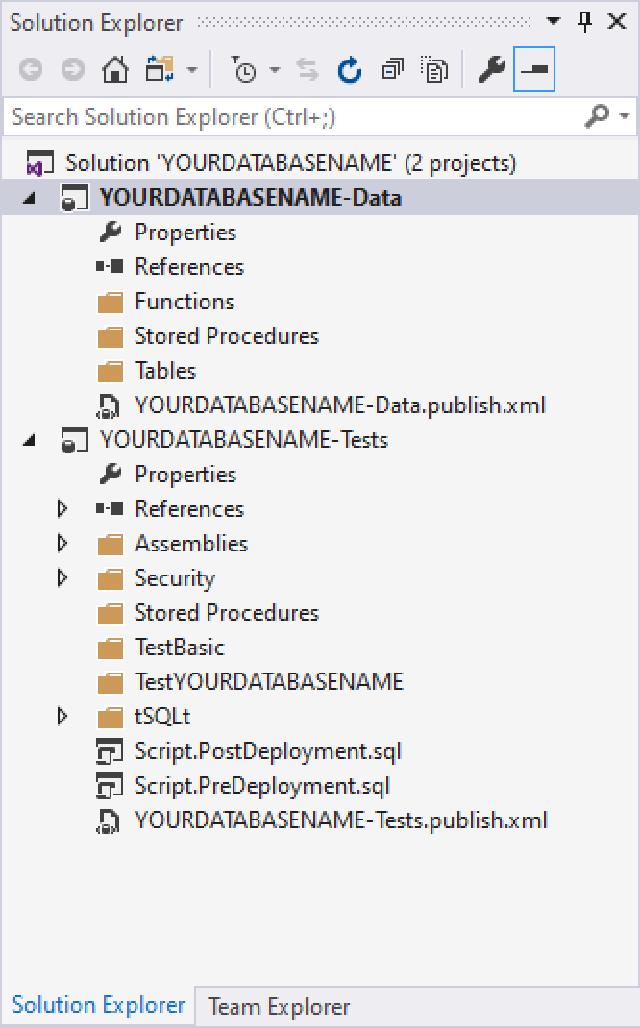
As you can see the solution has the name you gave it in the script. This is done throughout the entire solution. Opening up the solution with Visual Studio we can see the following in the Solution Explorer

As you can see it has two projects:
- YOURDATABASENAME-Data; Meant for the data model
- YOURDATABASENAME-Tests: Meant for the unit tests
Importing the current data model
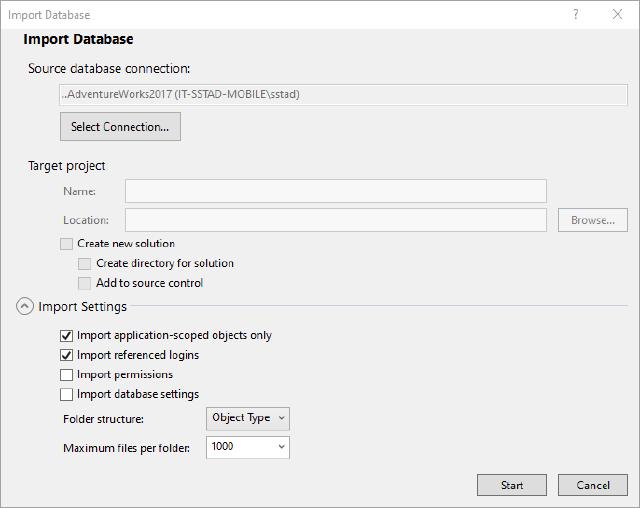
The next step will be to import your current database into the solution. Right-click the “-Data” project, go to “Import” and click on “Database”.

Then click on “Select Connection”, select the database, and click on “Ok”.

For smaller databases with the same schema I set the “Folder Structure” to “Object Type”.
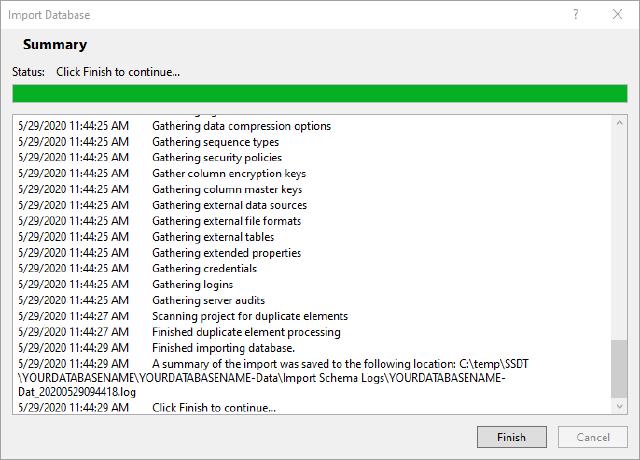
If you have many different schemas then selecting “Schema\Object Type” may be better. Click on “Start” and the result should look something like this:

Now the only thing that rests is to put your database in source control. Preferably you’re going to use Git because Git……. is awesome. You are now done creating the initial project. You can now do the same thing for the next database. I hope this helps you and any comment is appreciated.
