You always think your environment is set up correctly and that you’re able to recover in case of a disaster.
You make backups, test your backups, set up DR solutions, and in the end test the DR plan (very important). But have you ever considered a situation where all your data is unusable?
If you get infected with ransomware, and the trojan gets a hand on your backups, all your precautions and preparations have been for nothing.
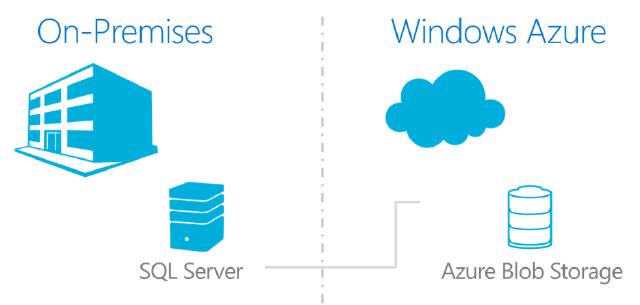
A solution for this would be to use Azure to store SQL Server backups offsite. That way at least your backup files will not be easily infected and encrypted and you will at least have your data.
Thanks to Stuart Moore for pointing me in the right direction.
Possible Solutions
Directly Backup to Azure Blob Storage
Since SQL Server 2012 SP1 CU2, you can now write SQL Server backups directly to the Azure Blob storage service.
This is very convenient when you directly want to save your backups offsite. To do this, instead of using a path, you assign a URL to backup, which would look similar to this:
BACKUP DATABASE [WideWorldImporters]
TO  URL = N'https://yourstorageaccount.blob.core.windows.net/backups/wideworldimporters\_backup\_2019\_08\_02\_155539.bak'
WITH NOFORMAT, NOINIT,  NAME = N'WideWorldImporters-Full Database Backup', NOSKIP, NOREWIND, NOUNLOAD, COMPRESSION,  STATS = 10
GO
Ola Hallengren’s Backup Solution
The SQL Server Backup solution Ola Hallengren has created also supports this feature. You specify an URL and a credential to set up the connection.
An example of the command would look like this:
EXECUTE dbo.DatabaseBackup
@Databases = 'USER_DATABASES',
@URL = 'https://yourstorageaccount.blob.core.windows.net/backups',
@Credential = 'MyCredential',
@BackupType = 'FULL',
@Compress = 'Y',
@Verify = 'Y'
Azure AzCopy
Another tool we can use to write our backups to Azure BLOB storage is to use the command utility AzCopy. The utility is free and can be downloaded from here . The advantage of this tool is that it can be used next to any other tool that is used to create backups. In most situations we backup files to a local disk, or network location. In the direct backup and Ola Hallengren’s solution, you have the choice to either backup to a file system or choose to backup to the Azure Blob storage.
Setting up the solution
In my ideal solution I would like to do both, backup the databases to the local file system or network and copy the files offsite.

To have all the flexibility and the security of the offsite backups I want one job to do all the work.
In normal circumstances, I would use my go-to hammer and script everything in PowerShell. Although that’s possible, our database servers are set up with Ola Hallengren’s SQL Backup to make the backups. To accomplish my solution I want to start another process to copy the files right after the backup job step completes.
Preparations
Most of the scripting will be done in PowerShell for creating the storage account, the container, and getting the access key.
Create the storage account
#we're going to use splatting
$NewStorageAccount = @{
   ResourceGroupName  = "dbatools"
   AccountName = "azblogdemo"
   Location = "Uk South"
   SKUName = "Standard\_GRS"
   Kind = "StorageV2"
   AccessTier = "Hot"
   EnableHttpsTrafficOnly = $true
}
#Create the Storage Account
New-AzStorageAccount @NewStorageAccount
In addition, you can create additional containers to hold your backups. In my case I created a container called “sqlbackup” but that’s not necessary.
Get access to the storage account
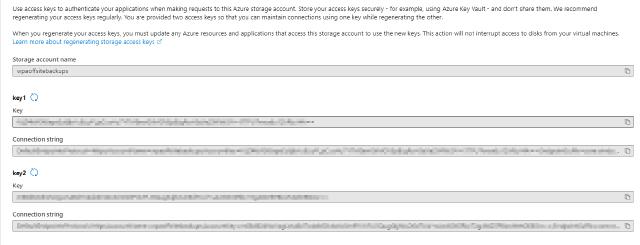
Each storage account has two access keys which give a resource the ability to access it.

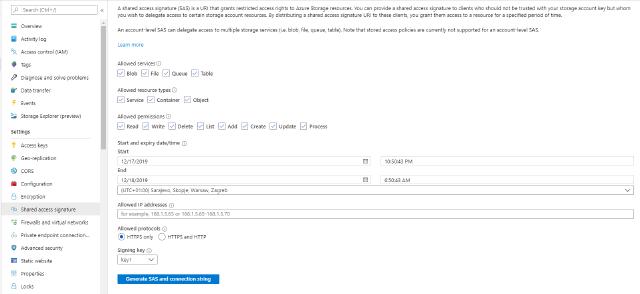
Although very handy, these keys give too many privileges to the resource that wants to access the storage account. Instead, you can create a signature that will enable you to specify the privileges more granular including services, resource types, permissions, and even the expiration time.

Select the proper permission, set the expiration, and hit the “Generate SAS…” button. This will generate the connection string

We will use the “SAS token” in the next step
Create the job step
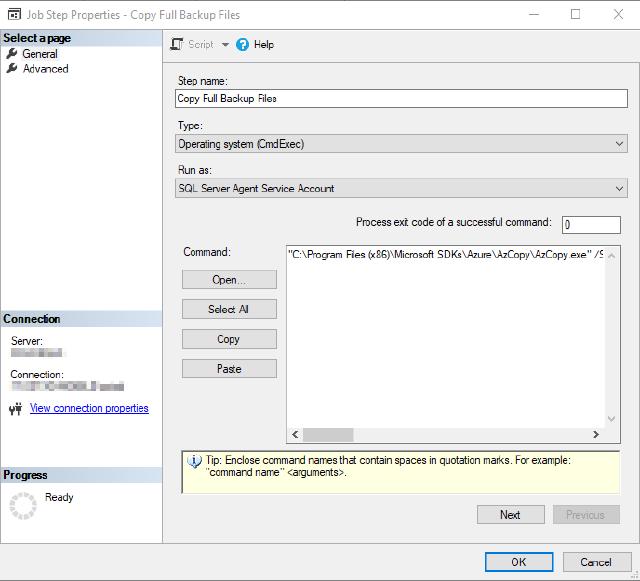
You can use the example code below regardless of the application used to execute “AzCopy.exe”. In my case, I wanted to use a SQL Server Agent job to do all the work. I scheduled the job to run every 30 minutes.
Make sure that the SQL Server Agent service account has access to the location of AzCopy.exe. At least read and execute the permission
Create a new job step with a Command Line Exec

"[location to azcopy]\AzCopy.exe" /Source:"[backup file location]" /Dest:"[yourstorageaccount]" /DestSAS:"[yoursassignature]" /Y /S /XO
An example
"C:\\Program Files (x86)\\Microsoft SDKs\\Azure\\AzCopy\\AzCopy.exe" /Source:"V:\\SQLServer\\Backup\\" /Dest:"https://myblobtest.blob.core.windows.net/sqlbackup" /DestSAS:"?sv=2018-03-28&ss=bfqt&srt=sco&sp=rwc&se=2020-08-06T14:43:18Z&st=2019-12-06T06:43:18Z&spr=https&sig=th6lchHLC6pH4TZhVrFHwWaazzddzMLakWkxUydOtH%2FdQo%3D" /Y /S /XO
Some other options
In my case, I wanted to separate the full backup files and the log files. To do that we can apply the “/Pattern” option. The code below filters out the “.bak” files.
"C:\\Program Files (x86)\\Microsoft SDKs\\Azure\\AzCopy\\AzCopy.exe" /Source:"V:\\SQLServer\\Backup\\" /Dest:"https://myblobtest.blob.core.windows.net/sqlbackup" /DestSAS:"?sv=2018-03-28&ss=bfqt&srt=sco&sp=rwc&se=2020-08-06T14:43:18Z&st=2019-12-06T06:43:18Z&spr=https&sig=th6lchHLC6pH4TZhVrFHwWaazzddzMLakWkxUydOtH%2FdQo%3D" /Pattern:"\*.bak" /Y /S /XO
This concludes the Azure BLOB storage setup to copy our backup files off-site. I hope you enjoyed this and maybe this comes in handy in your daily work.
